Nuke Tips & Tricks: 12 Time-Saving Nuggets of Comp Gold You Can't Live Without

Some compositors can spend years working in Nuke and only scratch the surface of its full potential. Others speak what seems like their own language—a dialect of custom gizmos, Python scripts, and expression-linked nodes that helps them navigate any production hurdle that crops up.
Naturally, as you become more familiar with Nuke, you pick up shortcuts and develop ways of working that enable a faster, more efficient workflow. But it can take a long time to get there 555; learning by doing is often a lengthy, sometimes painful process of trial and error.
With so many incredibly talented and experienced compositors in our global studios, we realized we were sitting on a goldmine of Nuke tips that could help even seasoned veterans save some serious time and sidestep common pipeline issues.
So, we’ve picked the brains of a handful of our top artists for little nuggets of Nuke gold, and they definitely did not disappoint.
Huge thanks to Outpost VFX Compositors Linda Kim, Daniel Pereira, Shaunik Kalia, Niamh Scott, Senior VFX Compositors Julien Record, Renaud Quilichini, and James Naud, 2D Supervisor Luddnel Magne, and Head of 2D Bjoern Gottwald for sharing their Nuke wisdom.
1. Clean the Pipe: Remove Unused Passes Early
Always remove unwanted or unused render passes running through your CG pipeline. Nuke will calculate every single existing channel in the stream even if they are not explicitly being used in your nodes downstream!
A simple Remove or Keep node placed early in the pipe will do the trick and immediately free up processing power.
Additionally, the Scanline Render node generates extra auxiliary passes by default. Make sure to remove them or disable them within the node's settings to keep your script lightweight.

FIG_02: Keeping the node graph stream clean by early extraction and removal of auxiliary passes.
2. Memorize Your Hotkeys
Even though it seems like a small detail, learning hotkeys is the difference between going home on time and getting stuck at your desk with hand cramps.
Go beyond the basic node creation shortcuts and learn the keys for fiddly tasks:
- Shift + X : Instantly swap the inputs of a node.
- Ctrl + Shift + Drag & Drop : Drag a node over another to swap them instantly in the stream.
- Ctrl + Shift + X : Eject a node completely from the stream without breaking the pipeline.
Practice these until they become muscle memory—your wrists will thank you!
3. Save Your Setups as Toolsets
When you've figured out a clean way of doing something that you know you'll use again, save that chunk of nodes as a Toolset.
By saving it to Nuke's user menu, you can instantly call it up again months later, long after you've forgotten the original comp you built it in. It's like writing letters of wisdom to your future self.
4. Watch Your Bounding Boxes (The Silent Performance Killer)
Always keep an eye on the bounding boxes generated in your Nuke scripts. Nodes and gizmos like Blur, Exponential Glows, Transforms, and Masks often expand the bounding box far beyond your shot's canvas.
This gets out of hand incredibly fast as Nuke starts calculating pixels in these invisible, extended regions, slowing down viewer feedback and rendering times. The CornerPin node is a classic culprit, skewing bounding boxes to extreme values.
Use Crop nodes periodically in your script to keep calculations strictly limited to only what's required within the frame.

FIG_01b: How uncropped nodes expand the bounding box far beyond the canvas format, killing calculation speed, and how Crop restricts it.
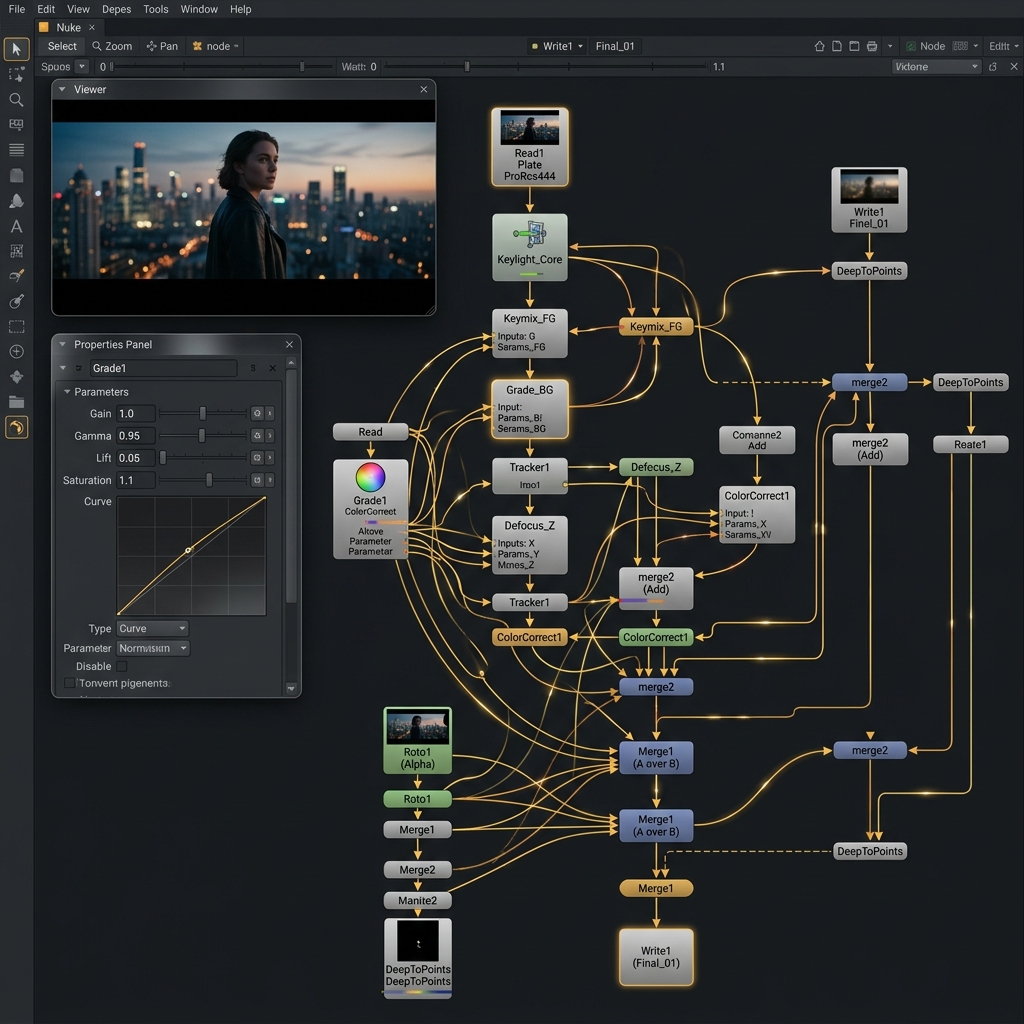
FIG_01: A clean, structured Nuke script with managed bounding boxes. This keeps your system memory free and speeds up viewer updates dramatically.
5. Clean Up Your Extraction Edges
When working on a green or blue screen extraction, a great way to fix bright or dark edge fringing is to do an Edge Extend on the image while it is Unpremulted.
Then, merge it back using a Minimum operation (for bright edges) or a Maximum operation (for dark edges). Just make sure to restrict the merge operation's channels to RGB so you don't corrupt your carefully pulled alpha channel!
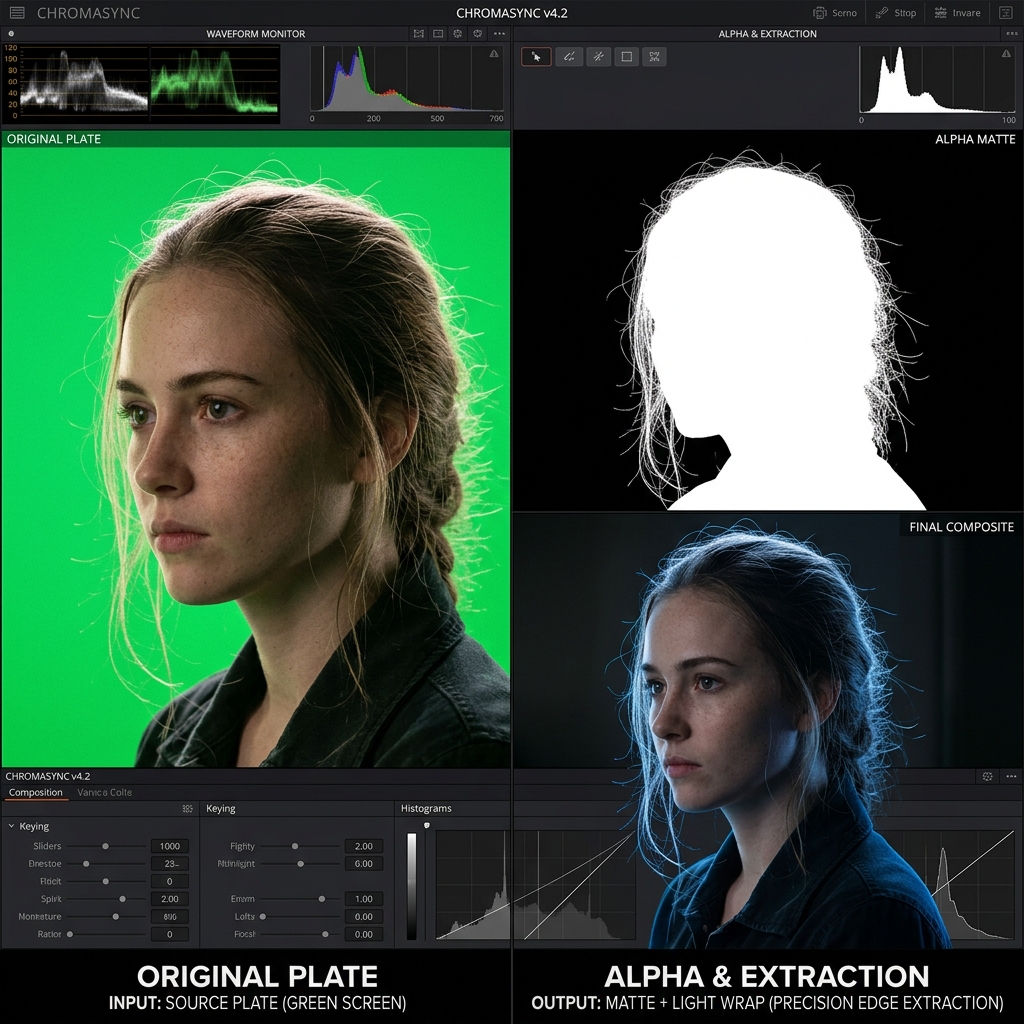
FIG_03: Restoring edge fine-detail against green backdrops with unpremultiplied edge extend methods.
6. Fast-Track Your 2D Relighting
If you're looking to give flat 2D elements realistic lighting depth or add custom specular hits, using a gizmo called Relight makes the job ten times easier.
Simply plug in a Normal node—this creates a normal map of the element based on either its alpha or luminance (whichever suits your target best)—and then plug it into the Relight gizmo.
From there, you can dynamically adjust the light angle, color, and strength. Merge the result over your element and you're good to go. It's a simple, elegant tool that saves hours when integrating 2D elements onto a moving plate.
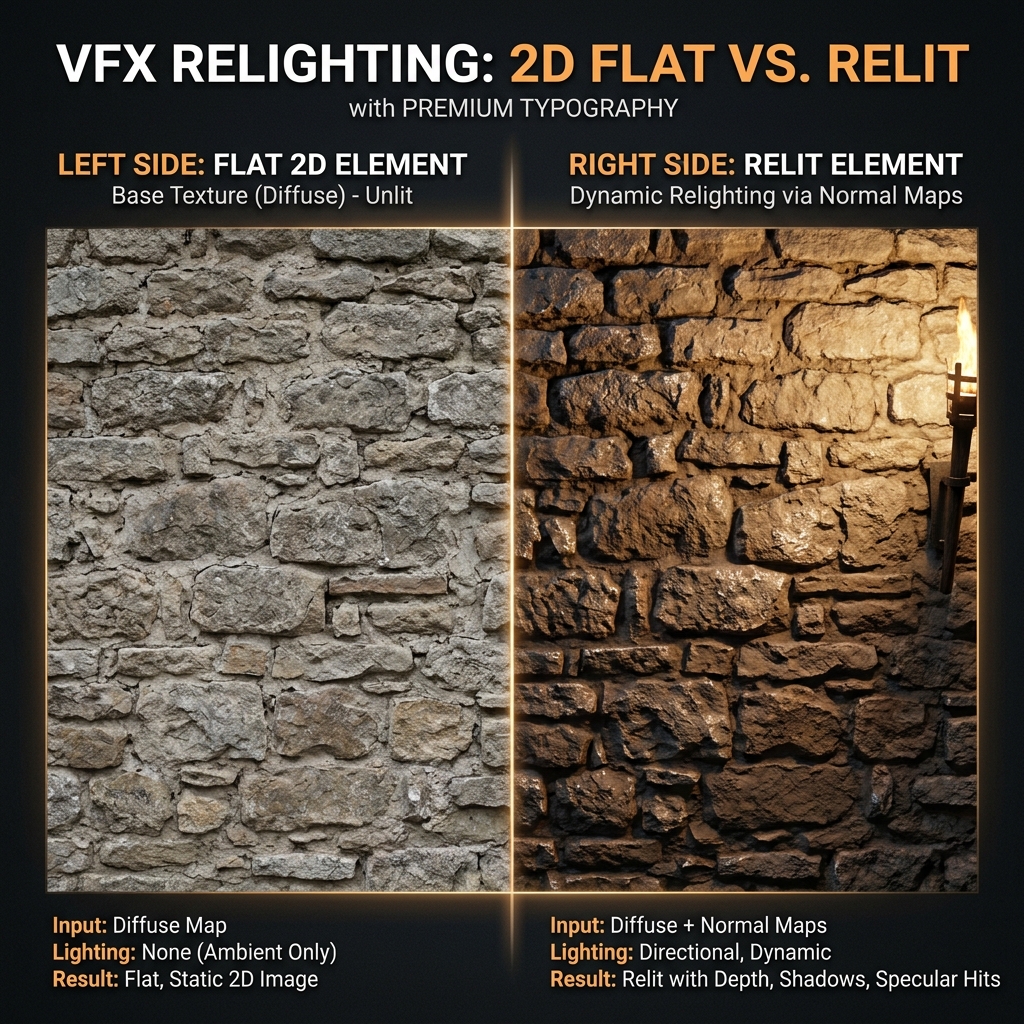
FIG_03b: Flat 2D elements (left) transformed with dynamic specular highlights and light interactions using generated normal maps (right).
7. Customize Your Node Shortcuts with Hotbox
If you want to speed up your workflow, look into Hotbox by Wouter Gilsing. It's an awesome, highly customizable UI tool that pops up right at your cursor, allowing you to quickly trigger custom values, load common setups (like projection rigs), or toggle node settings without having to open the properties panel at all.
8. Harness the Power of the $GUI Expression
You can optimize heavy scripts by preventing demanding nodes (like heavy defocus or motion blurs) from calculating while you're working in the Viewer—while still ensuring they fully execute when sent to the render farm!
You can set this up in two ways:
Disable Nodes in Viewer: Select a heavy node and press Ctrl + D. This automatically inserts a simple
$GUIexpression in the node's disable knob.Dynamic Values: Right-click on a numeric knob (like Scanline Render's samples), select Add Expression, and use this format:
$GUI ? [value to use in GUI] : [value to use on farm]For example, typing
$GUI ? 1 : 15means Nuke will only compute 1 fast sample while you're adjusting nodes in the viewport, but will execute a clean, high-quality 15-sample render on the farm.
(Pro tip: Make sure to leave a little sticky note in your script so other artists picking up your work aren't confused when comparing the viewer to the final farm render!)
9. Mastering the IBK Stacking Technique
A legendary way to pull a high-detail key is to stack the IBKColor node to create a near-perfect clean plate before feeding the result into the IBKGizmo's 'c' input pipe.
Here is how you stack them:
- Create your first IBKColor node: Set your screen color, set the size to 1 (preserving pixel-scale detail), and adjust the darks and lights until the subject disappears into a black silhouette against your blue/green screen. Erode slightly to remove fine details like hair or motion blur, and set patch black to 2.
- (Optional) if detail remains, stencil the subject out with a hard-edged, clamped Roto mask (ensure it is pure black and white, no grays).
- Duplicate the IBKColor node and plug the second one into the first. Expression-link (Ctrl + drag) the darks and lights knobs from the first node to the second. Set erode to 0, and double the patch black value to 4.
- Duplicate it again and double the patch black to 8.
- Repeat this doubling process (8 ➜ 16 ➜ 32...) until the black silhouette is completely filled.
This creates a clean plate that perfectly preserves the organic lighting gradients and folds of your original green screen, keeping your final alpha edge beautifully detailed.

FIG_04: Sequential stacking and doubling of patch black values to reconstruct an organic green clean plate.
10. Replicate Grain with Dasgrain
Applying grain is often a minor detail but absolutely critical to making a composite look photo-real. It's the easiest thing to overlook when you're rushing to hit a deadline.
A lifesaver tool for this is Dasgrain, a popular gizmo available on Nukepedia. This tool perfectly captures the organic grain structure of your original plate (the part you denoised) and reapplies it to your painted patches or CG elements.
By using its "scatter" option with a localized mask, it sources grain directly from the surrounding plate and lays it over your work, ensuring everything matches the camera's original sensor noise seamlessly.
💡 The Golden Rule: Keep It Clean and Never Stop Learning
Taking a few minutes to optimize, label, and clean your node graph from the very beginning will save your sanity when a client requests urgent changes at the final hour.
And remember: "There is no single magic bullet for every shot." The recipe that worked perfectly yesterday might fail completely on a different sequence tomorrow. Having a diverse toolkit of techniques and staying curious is what separates a junior artist from a true master of the craft. Happy comping!